Before autumn officially arrived, Sweet Lemon asked us Lemonettes (and Lemon Lads) what was on our bucket lists for Fall 2013. For me, autumn is all about baking.
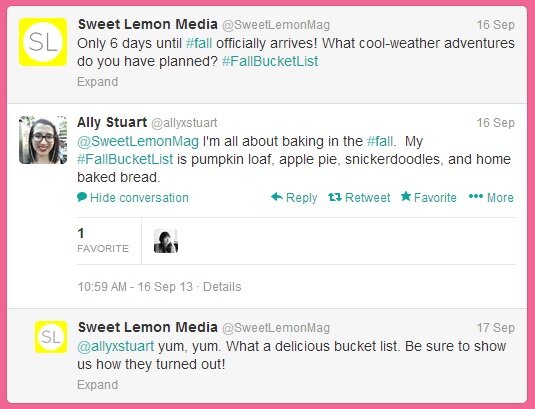
Inspired by that tweet-versation, first up on my #FallBucketList is Pumpkin Loaf.
Equipment:
- 2 loaf pans, 9” x 5” x 3”
- Electric hand mixer
- Extra-large mixing bowl
- Large mixing bowl
- Set of dry measuring cups
- Set of dry measuring spoons
- Wet measuring cup
- Wooden spoon
- Wire cooling rack
Ingredients:
[Recipe courtesy of Better Homes & Gardens]
- 3 cups of sugar
- 1 cup of cooking oil
(Tip:Use canola, sunflower, or vegetable oil, as the flavor of olive oil will affect the flavor of the final product.)
- 4 eggs
(Tip:Leaving the eggs out in a bowl to warm to room temperature will assure a smoother blend.)
- 3 ½ cups of all-purpose flour
- 2 teaspons of baking soda
- 1 ½ teaspoons of salt
- 1 teaspoon of ground cinnamon
- 1 teaspo0n of ground nutmeg
- 2/3 cup of water
- 1 15 oz. can of pure pumpkin
(Tip:Only use pure canned pumpkin. Canned pumpkin pie filling is pre-sweetened and seasoned. You can also use about 2 cups of fresh pumpkin puree in place of canned, but your loaf may not be as sweet.)
Optional Ingredients:
- ¾ cup of crushed walnuts or pecans
Ready, Set, Bake!
1) Preheat your oven to 350°F and prepare your loaf pans by greasing them with a little bit of canola/sunflower/vegetable oil on a piece of paper towel. (Tip: Make sure that your pans are well greased, or you pumpkin loaf will stick and you’ll only get chunks out of the pan instead of slices.)
2) Mix together the sugar and oil in your extra-large mixing bowl until well blended, using your electric mixer (medium speed, if you please). Add your eggs and blend again, until the wet mixture is a uniform, almost buttery yellow color. (The vibrancy of color will depend on how yellow/orange the yolks of your eggs are.)
3) Mix together the flour, baking soda, salt, cinnamon, and nutmeg in your large bowl with your wooden spoon.
4) Starting with the dry mix, alternately add the dry mix and water to the wet mix (dry, water, dry, water, dry), blending with your mixer (low speed) after each. Once all of the dry mix and water has been added, blend the batter until it’s just combined. Overmixing it will make your pumpkin loaf tough.
5) Add the pumpkin and blend the batter (again, low speed) until it’s incorporated.
6) (Optional) Using your wooden spoon, fold the chopped nuts into the batter. (Tip: If you stir them in, they’re likely to sink to the bottom and won’t be evenly incorporated into the pumpkin loaf.)
7) Pour the batter into the pans, making sure not to overfill. You can always grease another pan if you have excess batter.
8) Bake for 55-65 minutes, until the pumpkin loaf is GBD (golden brown delicious). When it’s done, the top should spring back when pushed gently with a fingertip and a toothpick inserted into the thickest part should come out clean. Cool it on your wire rack for 10 minutes in the pan, then (if you can do it without breaking the loaf) remove the loaf from the pan and leave it out on the wire rack to completely cool. (Tip: If you live at a higher altitude, you may need to cook the loaf for longer. Likewise if you’ve put too much batter in the pans.)
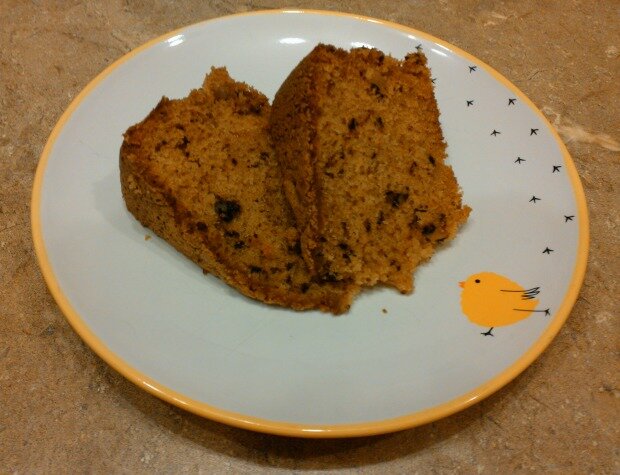
9) Chill, slice, and enjoy!
What are your favorite #FallEats, Lemonettes and Lemon Lads? Share them with me in the comments, on Twitter, or on Instagram!
By