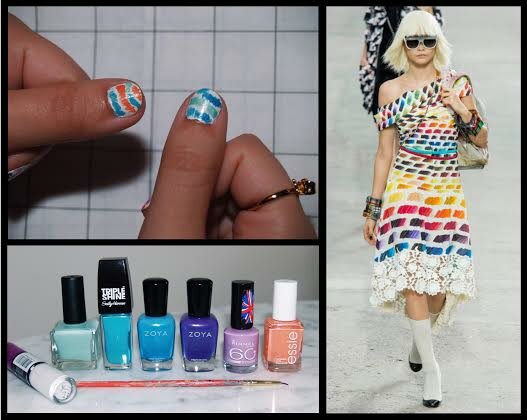
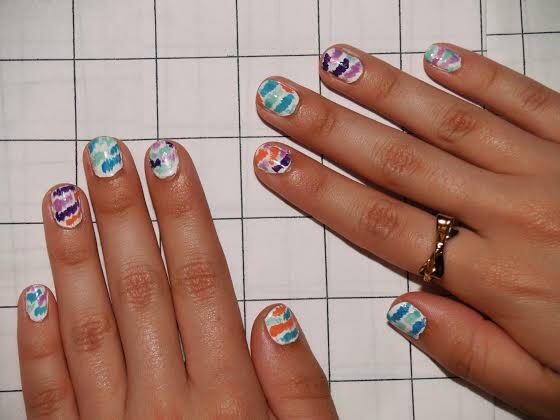
A manicure straight off the catwalk, how does that sound? When Karl Lagerfeld decided to channel his inner artist for Chanel’s SS/14 collection, I couldn’t pass the opportunity to dream up a mani that captured the essence of his show. Just as Lagerfeld sent a parade of models down the runway in some of the most eye-popping and almost paint chip-inspired prints of the season, you too can create your very own masterpiece in the form of nail art.
Luckily, this Chanel-inspired mani is as painterly (and easy-peasy) as they come. It just goes to show that a blank slate (or rather a canvas) can take you far.
What You’ll Need:
- A handful of your favorite nail polish colors. While Chanel incorporated every color of the rainbow, I settled for greens, blues, purples and a pop of coral. (Just FYI, I used: Zoya “Mira,” Zoya “Robyn,” Essie “Tart Deco,” Rimmel “Sweet Lavender,” Sally Hansen “Dive In” and Urban Outfitters “Smush.”)
- White nail polish for the base coat
- Small bristled paint brush
- Nail polish remover + cotton pads
- Optional: Scrap of cardstock (to practice on)
How-To:
1. Begin by applying a white base to all nails. Depending on the sheerness of the lacquer, additional coats may need to be applied. Let dry.
2. Once you’ve decided on a color scheme for your nails, begin by dipping the tip of your paintbrush into your first color. Emulate the brushstrokes seen in Chanel’s spring collection by applying the nail polish in an up-and-down wave-like motion. As the scribble is supposed to be painterly, don’t worry if it’s not perfect. (If you’re concerned about your artistic skills, you can always practice on a piece of cardstock. I would actually recommend doing just that, so that you can get a feel for how much nail polish is needed for the design. While too much polish will create a shapeless blob, too little won’t allow you to complete the entire wave-like motion.)
3. Between applying each color, make sure to clean off your paint brush with nail polish remover so that the colors don’t get mixed and to prevent the bristles from hardening.
4. Apply the second and third consecutive colors, utilizing the same brushstroke motion that you perfected in step #2. For convenience sake, I focused on each nail individually rather than doing them all simultaneously. Take note, your painterly strokes don’t have to be perfectly symmetrical, I opted instead for diagonal squiggles. I stuck with 2-3 colors per nail to maintain a cohesive design.
While I would normally apply a clear topcoat for good measure, with this mani I’ve found that it’s not necessary. Personally, I prefer the matte finish as it has a more undone, artist-in-process feel to it.
For once, I found a manicure that is just as easy to achieve with my left hand as it is my right (I’m a lefty…) At the end of the day, fashion is art, so why not try this mani on for size?!
By


